Let's build a navigation menu example that highlights the active link in NextJs 13.
In order to determine the active link from a navigation menu we will need to use the layout files and the useSelectedLayoutSegment() client hook.
Building the navigation menu in NextJs 13
Let's first start by making a simple navigation menu. Our app will have three pages:
/
/store
/about
Each of the app/page.js , app/store/page.js, and app/about/page.js files will just render a simple header similar to the one below:
export default function Page() {
    return <h1>Home</h1>
}
Given that the navigation menu needs to be present on all the pages, the perfect place to add it would be in the main layout file of the app, the app/layout.js:
// app/layout.js
import NavLink from './NavLink'
import Link from "next/link"

export default function RootLayout({ children }) {
  const activeSegment = useSelectedLayoutSegment()

  const links = [
    {label: '🏡 Home', path: '/'},
    {label: '📦 Store', path: '/store'},
    {label: '📘 About', path: '/about’}
  ]

  return (
    <html>
      <head />
      {links.map ( (l, i) =>
        <Link style={{
                padding: '0.5rem'
            }}
            key={i}
            href={l.path}>
                {l.label}
        </Link>
      )}
      <body>{children}</body>
    </html>
  )
}
The navigation will be made with the basic NextJs link components.
At this point, if we run the code we will get the navigation menu that we can use to move from one page to another:
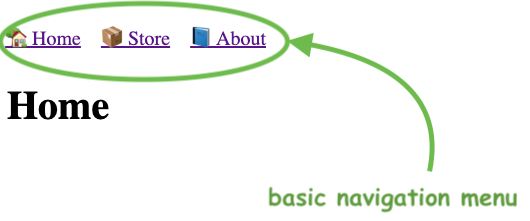
Highlight the active menu link in NextJs 13
While the navigation works as supposed, it does not yet highlight the currently active link.
For this, we will need to include the useSelectedLayoutSegment() hook:
// app/layout.js
'use client'
import NavLink from './NavLink'
import Link from 'next/link'
import { useSelectedLayoutSegment } from 'next/navigation'

export default function RootLayout({ children }) {
  const activeSegment = useSelectedLayoutSegment()

   const links = [
    {label: '🏡 Home', path: '/', targetSegment: null},
    {label: '📦 Store', path: '/store', targetSegment: 'store'},
    {label: '📘 About', path: '/about', targetSegment: 'about'}
  ]

  return (
    <html>
      <head />
      {links.map ( (l, i) =>
        <Link style={{
                textDecoration: (activeSegment === l.targetSegment) ? 'underline' : 'none',
                padding: '0.5rem'
            }}
            key={i}
            href={l.path}>
                {l.label}
        </Link>
      )}
      <body>{children}</body>
    </html>
  )
}
A few changes were added at this step:
- given that
useSelectedLayoutSegment()is a client hook we need to mark the full layout as a client component - the result of
useSelectedLayoutSegment()will be stored inactiveSegment. Keep in mind that for the root/path, theuseSelectedLayoutSegment()will return null - the items from the
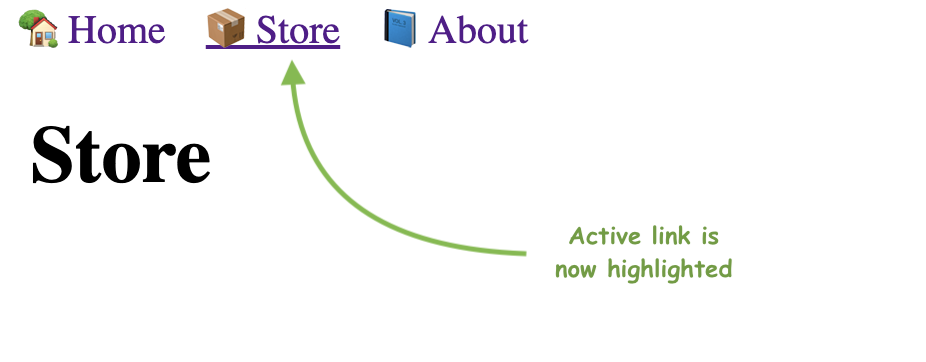
linksarray got a new property calledtargetSegment. In the styles of the Link components, thetargetSegmentproperty will be compared with theactiveSegmentto conditionally apply a text underline just to the active link.
At this point our app will look like this:
Extracting the active menu link component
One improvement we can do to our code is to extract some of the complexity of the navigation link into a component of its own.
Actually, in general, is good to have the client components as leaves, as isolated as possible.
With this in mind, we will create a NavLink component. The scope of this component will be to render a basic NextJs Link, and conditionally apply a style based on the answer we get from the useSelectedLayoutSegment() hook.
Given that in the app folder we can now put also components the NavLink component will go directly here:
// app/NavLink.js
'use client'
import Link from 'next/link'
import { useSelectedLayoutSegment } from 'next/navigation'

export default function NavLink({label, path, targetSegment}) {
    const activeSegment = useSelectedLayoutSegment()
    return (<Link style={{
            textDecoration: (activeSegment === targetSegment) ? 'underline' : 'none',
            padding: '0.5rem'
            }}
            href={path}>
            {label}
        </Link>)
}
With this in place, we can now simplify the layout.js and also remove the use client directive as it is not needed anymore:
// app/layout.js
import NavLink from './NavLink'

export default function RootLayout({ children }) {
  const links = [
    {label: '🏡 Home', path: '/', targetSegment: null},
    {label: '📦 Store', path: '/store', targetSegment: 'store'},
    {label: '📘 About', path: '/about', targetSegment: 'about'}
  ]

  return (
    <html>
      <head />
      {links.map ( (l, i) =>
        <NavLink key={i} {...l} />
      )}
      <body>{children}</body>
    </html>
  )
}
And voila, there we have a full working navigation for our NextJs app.
You can check out the full code for this example here.
Please note that this tutorial is meant for NextJs 13 and future versions. You can check here how to detect the active Link in NextJs 12 and earlier versions.
📖 50 Javascript, React and NextJs Projects
Learn by doing with this FREE ebook! Not sure what to build? Dive in with 50 projects with project briefs and wireframes! Choose from 8 project categories and get started right away.
📖 50 Javascript, React and NextJs Projects
Learn by doing with this FREE ebook! Not sure what to build? Dive in with 50 projects with project briefs and wireframes! Choose from 8 project categories and get started right away.