In today's example let's see how can we implement a simple mechanism for autosaving data from an HTML form. We will do this by using simple tools such as vanilla Javascript and the Fetch API.
Few things are as annoying as filling data in a form and losing that data right before hitting submit. In order to avoid this we will autosave the data each time after the form is changed.
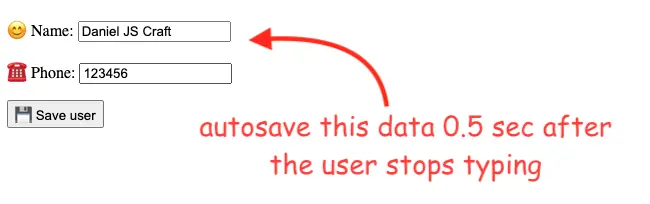
Below is what the final example will look like:
Setting up the auto-save HTML form
The form consists of just two simple inputs for the name and phone values:
<form method="post" action="https://jsonplaceholder.typicode.com/users">
    <input type="hidden" name="submitted" value="true" />
    <p>
        <label for="name">😊 Name:</label>
        <input name="name"/>
    </p>
    <p>
        <label for="phone">☎️ Phone:</label>
        <input name="phone" />
    </p>
    <button type="submit" name="action" value="save">
        💾 Save user
    </button>
</form>
As a test backend, we will use the jsonplaceholder API.
Implementing the autosaving functionality
The JavaScript code manages a timer that triggers the saving process after a set interval. This code ensures that changes to the form are saved automatically every 0.5 seconds:
const DELAY_ML = 500
let autoSaveTimer = null;

const setupAutoSaveTimeout = () => {
    // at form update be sure to cancel other pending auto-save timeouts
    clearTimeout(autoSaveTimer)
    autoSaveTimer = setTimeout( doAutoSave, DELAY_ML)
}

const doAutoSave = () => {
    const action = form.getAttribute( "action" )
    const formData = new FormData( form )
    fetch( action, {
        method: form.getAttribute( "method" ),
        body: formData
    }).catch(
        err => console.error(err)
    );
}

const form = document.querySelector( "form" )
// 0.5 seconds after the form is updated autosave the data
form.addEventListener( "input", setupAutoSaveTimeout )
form.addEventListener( "submit", () => clearTimeout(autoSaveTimer))
How does it work:
-
Event Listeners: We add event input listeners to the form so that when the user interacts and types something into the form the
setupAutoSaveTimeout()function is called. -
Timer Management: The
setupAutoSaveTimeout()function cancels any previous auto-save timers. It then sets a new timer to invoke thedoAutoSave()function after 0.5 seconds. This works as a Javascript debounce mechanism. -
Auto-Saving: The
doAutoSave()function is triggered once the timer elapses. It collects the form data using the FormData API, constructs a Fetch request, and sends the data to the dummy backend. -
Submit Event: To prevent auto-saving when the user explicitly submits the form, there's an event listener on the "submit" event. This listener clears the autosave timer, ensuring that the data isn't saved redundantly.
You can see the running example on Github pages and the full code here.
📖 50 Javascript, React and NextJs Projects
Learn by doing with this FREE ebook! Not sure what to build? Dive in with 50 projects with project briefs and wireframes! Choose from 8 project categories and get started right away.
📖 50 Javascript, React and NextJs Projects
Learn by doing with this FREE ebook! Not sure what to build? Dive in with 50 projects with project briefs and wireframes! Choose from 8 project categories and get started right away.