In today's article, we will build a simple app where we can upload an image, and using Javascript and the canvas element we will get a black-white plus a grayscale version of that image.
I will not get into too many details about the initial setup of the project. For a better understanding, I encourage you to read the posts about how to upload an image and generate its preview, and invert the colors of a picture on a canvas.
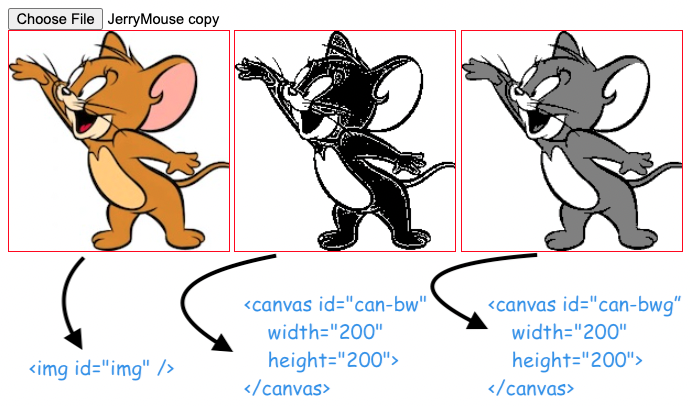
So, we will start with this HTML code:
<input id="inp" type='file' accept='image/*' capture='camera'/>
<img id="img" />
<canvas id="can-bw" width="200" height="200"></canvas>
<canvas id="can-bwg" width="200" height="200"></canvas>
And from this Javascript:
const input = document.querySelector('#inp')
const img = document.querySelector('#img')
const ID_BLACK_WHITE_CANVAS = 'can-bw'
const ID_GRAY_CANVAS = 'can-bwg'
input.addEventListener('change', () => {
const url = URL.createObjectURL(input.files[0])
img.src = url
})
img.onload = ()=> {
setupCanvas(ID_BLACK_WHITE_CANVAS, toBlackAndWhite)
setupCanvas(ID_GRAY_CANVAS, toBlackWhiteGray)
}
const setupCanvas = (id, pFunction)=> {
const canvas = document.getElementById(id)
const ctx = canvas.getContext('2d')
ctx.drawImage(img, 0, 0)
processCanvas(canvas, ctx, pFunction)
}
const processCanvas = (canvas, ctx, pFunction)=> {
const imgData = ctx.getImageData(0, 0, canvas.width, canvas.height)
imgData.data = processImgData(imgData, pFunction)
ctx.putImageData(imgData, 0, 0)
}
const processImgData = ({data}, pFunction) => {
// use the pFunction to process the image
return data
}
const toBlackAndWhite = () => {
// to be implemented
}
const toBlackWhiteGray = (red, green, blue) => {
// to be implemented
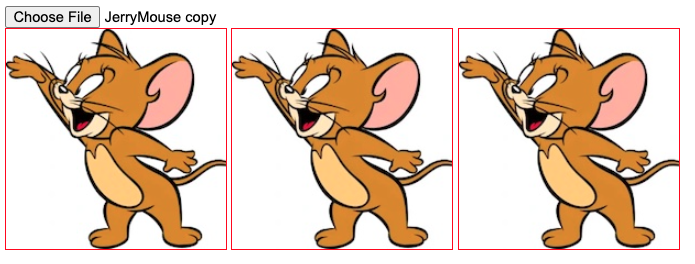
}For the time being what this code does is just display the same picture we initially upload in the two canvases:
By the way, if you want to add CSS styles on the upload button I've written a tutorial about this.
The data that arrives in the processImgData() is the result of ctx.getImageData(). As we have seen in the example with inverting the colors of a picture each set of 4 items from the data parameter represents an RGBA set for a pixel from the image. So, we can do something like this:
const processImgData = ({data}, pFunction) => {
  for (i = 0; i < data.length; i += 4) {
    data[i] //  red (0-255)
    data[i + 1] //  green (0-255)
    data[i + 2] //  blue (0-255)
    data[i + 3] //  alpha (0-255, 0 = transparent, 255 = fully visible)
  }
  return data
}
Therefore we need to find a way to convert the RGBA values to just one black/white/gray value.
The key points here are the toBlackAndWhite() and toBlackWhiteGray() functions, which are not yet implemented.
A toBlackWhiteGray() function can look like this:
const toBlackAndWhite = (red, green, blue) => {
  const count = red + green + blue
  const colour = count < 383 ? 0 : 255
  return colour
}
While the toBlackWhiteGray() function can look like this:
const toBlackWhiteGray = (red, green, blue) => {
  const count = red + green + blue
  let colour = 0
  if (count > 510) colour = 255
  else if (count > 255) colour = 127.5
  return colour
}
Of course, we can tweak the way we interpret the gray color, and could add a more complex grayscale to the function.
Finally, with these functions implemented, we can now replace a color pixel with the result of one of these functions:
const processImgData = ({data}, pFunction) => {
  for (i = 0; i < data.length; i += 4) {
    const color = pFunction(data[i], data[i+1], data[i+2])
    data[i] = color
    data[i + 1] = color
    data[i + 2] = color
    data[i + 3] = 255
  }
  return data
}
You can see here the full working codepen for this example.
I will leave it as homework to you to implement the functionality of downloading the resulting images. Hint, you can use the download attribute of links for this.
📖 50 Javascript, React and NextJs Projects
Learn by doing with this FREE ebook! Not sure what to build? Dive in with 50 projects with project briefs and wireframes! Choose from 8 project categories and get started right away.
📖 50 Javascript, React and NextJs Projects
Learn by doing with this FREE ebook! Not sure what to build? Dive in with 50 projects with project briefs and wireframes! Choose from 8 project categories and get started right away.